--Chuck Update from the future-- 1-26-2022 - I still use this cooler every time I am in the garage. It is still awesome. I did have to replace the amp in it at some point along the way, but it is still operating great with the same speakers and battery from 2009 when this was built.
I saw something similar to this awhile back at a tailgate and decided that I wanted to make my own cooler modified into a speaker system capable of playing audio from any MP3 player. Below is how I went about constructing this and will soon contain pictures of the end result.
Here is what you will need:
- Cooler with a latching lid. - I choose an Igloo brand sold at Target. I wanted one with wheels for easy transport.
- Car Speakers - I chose marine grade 6x9 inch speakers made by Polk
- Car Amplifier - I chose a Pioneer model that was 2 channel and about 70 watts per channel. You will want to be sure you get one small enough to fit in your cooler. Watts output isn't such a big deal here, as more will suck your battery quicker and even 20 watts will put out lots of sound. I recommend getting one with bass boost, as you might want that.
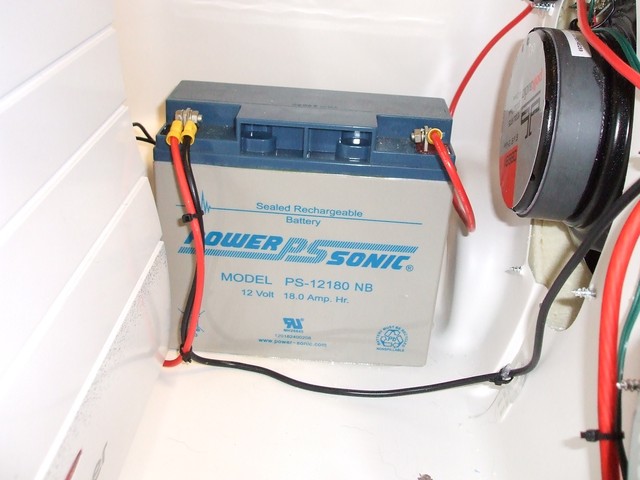
- Battery - I chose a smaller sealed deep cycle battery from Battery Source. You will want a sealed battery regardless since you will be transporting this rig and don't want an acid spill.
- Some charging mechanism for the battery - I am using a battery tender that will charge and keep the battery charged as long as it remains plugged in.
- Power wiring for the battery and amp including a fuse
- On off switch
- Caulk
- Stick-on plastic wall hooks
- Audio cable that takes your MP3 player's headphone output and converts it to RCA male for amp input
- Tools
Let's get to building! I laid out the 6x9 speakers on the front of the cooler to select positioning and space requirements and then marked their cutout with a sharpie. Your speakers should come with cutout templates to use for marking and cutting holes.
I used a jigsaw to cut the holes. This is a messy job and insulation went everywhere, so do this outside.
I mounted the 6x9 speakers initially with only caulk around the edges. Be sure to allow for more caulk around the edges where the speaker edge meets a cooler ridge so that there are no air leaks. I ended up getting 3 inch screws to use for screwing in the speakers. This might be overkill for your install, but my cooler was thick and the speaker grills were as well. Screwing into the plastic cooler holds fine. I had considered placing something on the inside of the cooler for the screws to bite to, but the plastic was sufficient. If you are planning on really beating your cooler around, you might want to consider this and use something like a wood block on the inside of the cooler to screw into.
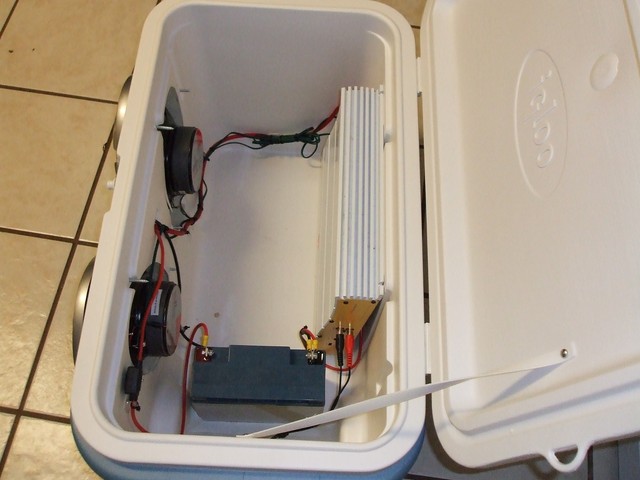
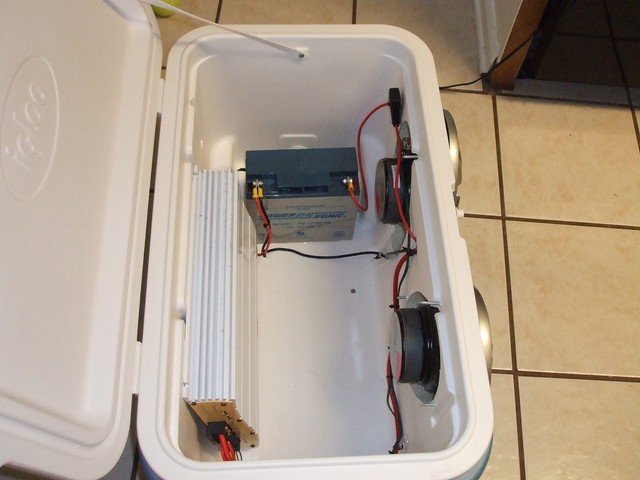
Next I laid out the amp position and the battery position. I decided to mount the amp to the wall of the cooler to allow for more room to place dry goods into the cooler for easy transport. (The cooler can no longer be a true cooler once we are all said and done though of course.)
The battery is the heaviest component, so I chose to mount it to the floor of the cooler and as close to the wheels as possible to minimize weight on the handle. I initially used the caulk to hold it down, but this did not hold, so I switched to liquid nails.
I laid out the wiring and used stick on wall hooks to stick to the inside of the cooler at various locations and allow for wires to be zip tied to them for a neater installation. This worked well. The wires are protected from disconnecting and are out of the way.
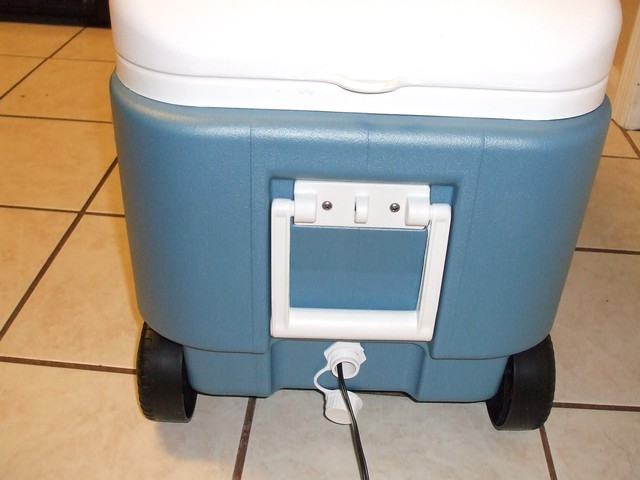
I drilled a hole in the center of the front of the cooler for the on off switch. I chose this location since the grills stick out and I wanted to make sure the switch was semi-protected from being turned on during transport in a car or otherwise. I think this location works ok and the switch has a light on it so I can easily tell when the power is on. For long term storage, I will take the fuse out of the main power wire to avoid any accidents.
The MP3 to RCA cable and battery charging cable will be run inside the cooler by utilizing the cooler's water drain hole.
The sound of the cooler is pleasant and can get really loud. The bass is boomy with the cooler closed and latched. Opening the cooler reveals just how much bass the cooler is creating by being a speaker box for the system. The is a neat project and I am going to use mine as a stereo in the garage when it is not at the beach. I am happy with the result and it makes for an interesting conversation piece.
More pictures of the end result: