Desired result: Space saving, quiet computing IPCop firewall server. Extra points for cool looks the girlfriend doesn't mind looking at.
*EDIT 11-23-10 See below for version 2 of this wall mounted solution. I build one for my home VMware ESXi rig. Details are at the end of this post.
Sitting around drinking beer one day a buddy and I thought we needed to make something cool to house his IPCop server. He had it in a case on a shelf in his laundry room, but this was not pretty, quiet or cool. I said, why not mount it to the wall or something, and then we started drawing. After much discussion and a discovery trip to the hardware store, this is the result:

Build list: Plywood Acrylic sized to plywood 1/2 inch copper tube from the plumbing section Various rubber washers from plumbing section 1/2 inch screws 4 inch screws Wall anchors Zip ties Gloss black spray paint and primer Double sided tape
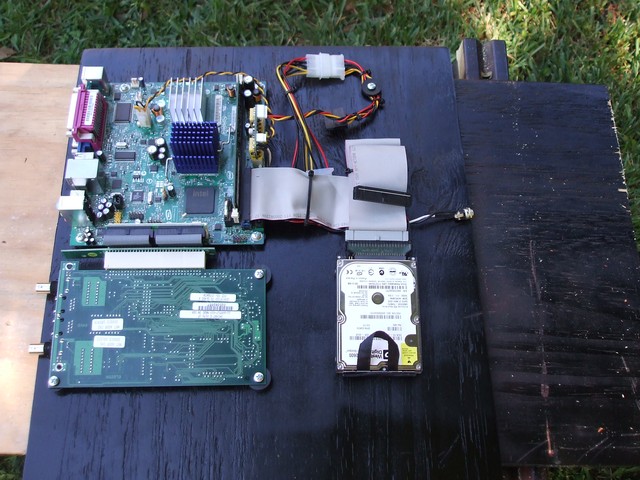
Computer: Intel Atom dual core 1 gig RAM 40 gig hard drive PicoPsu 60 watt and AC to DC power supply Zalman chipset heatsink for Atom chipset to replace stock heatsink and fan so it is quieter PCI riser cable Dual NIC
Photos of the build:
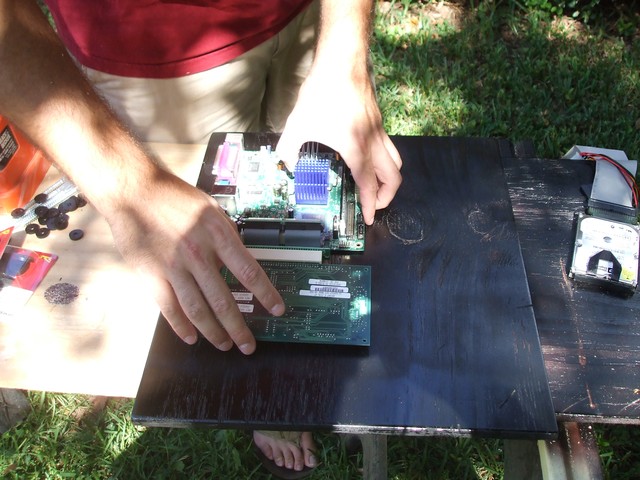 Laying out parts on painted plywood.
 Motherboard and NIC mounted using rubber washers to make them standoff from the wood. We didn't want to but realized that we had to mount the NIC upside down. Oh well. Notice this NIC is older than dirt and has coax input. It is a 16 year old 10Megabit card, but it is still going strong. His internet comes in at 3 Megabits, so no speed bottleneck there.
 Hard drive mounted with double sided tape. This hard drive will be replaced with a 3.5 inch drive at the last minute when we got lazy and used the drive that was serving IPCop when it was in the normal case so as to save time not having to install it to the laptop drive. (I got overruled here. I thought we should use the laptop drive to make it a quieter system that used less electricity. Ultimately, it was Steve's computer so his choice.)
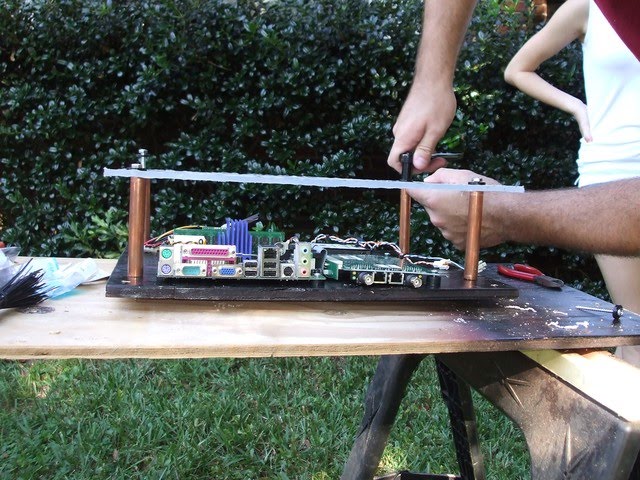 Acrylic mounted using 4 inch screws and copper pipe as standoffs. There is room here to stick a hand in to do maintenance without taking off the acrylic.
 Almost finished. Got it all installed, and need to drill holes for hard drive led and power switch.
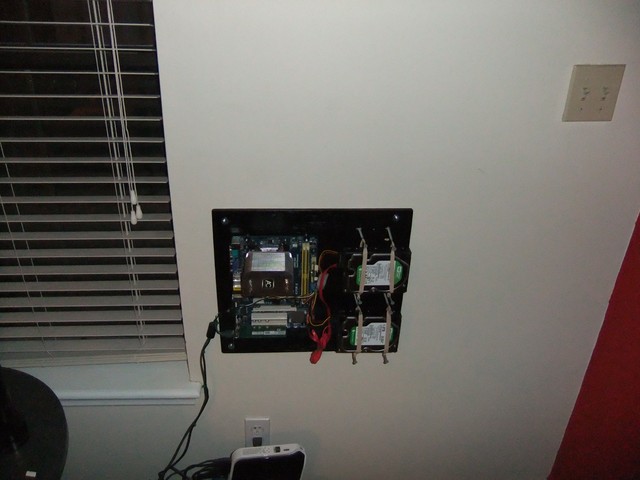
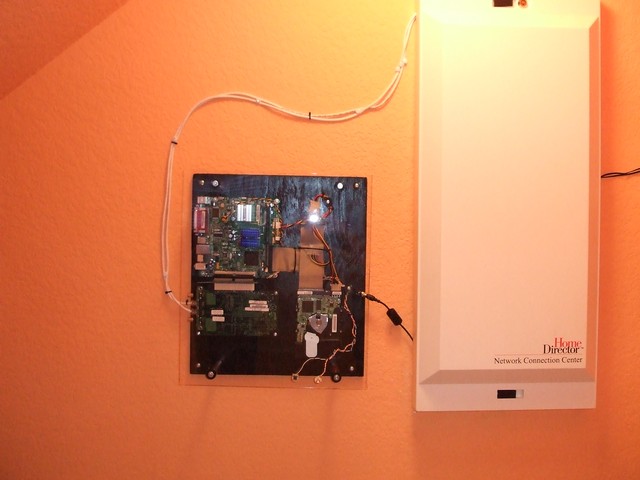
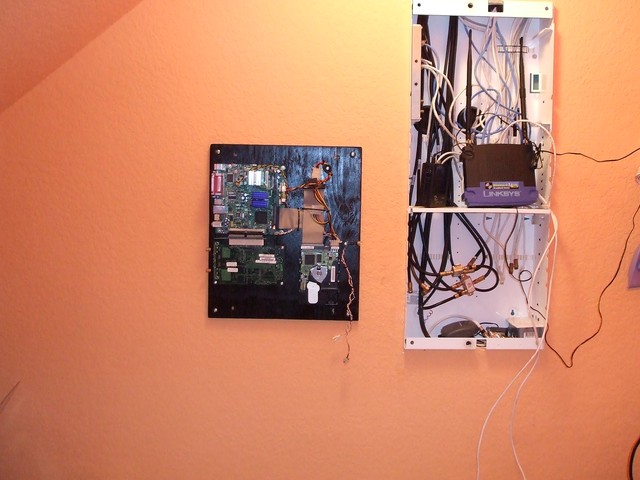 Mounted to the wall using screw in drywall anchors. The computer weighs less than 20 lbs. Power comes from a laptop type power brick included in the PicoPsu kit.


The builders Steve and Chuck
Final thoughts: Using the Atom saves electricity and allows for a fanless solution. There is enough room between the wall and the acrylic for air to pass through and heat to be dissipated. The hard drive is the only moving part. Next time maybe we will mount a CF card so that there are no moving parts. The old NIC is there due to the fact that the onboard NIC wasn't supported in IPCop, we would have had to add a 2nd NIC via the PCI slot anyways, and it was a nice excuse to put the old dual NIC to use. The PCI riser was what saved us and allowed us to mount it onto the wall nicer.
This would be a good solution for an ESXi box or a Windows Home Server box too. Moving and maintenance are more of a pain, but it doesn't take up floor space. The PicoPSU is a good solution where you aren't using a gaming PC since it provides solid power with no noise and good efficiency to lower wattage computer loads.
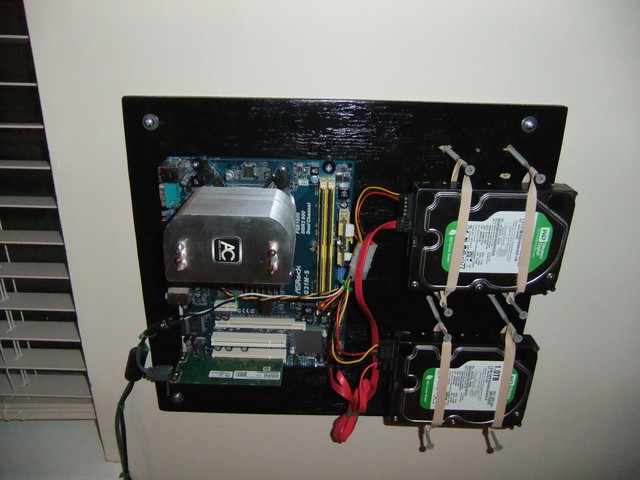
*Chuck's ESXi wall mounted computer. Take two of Steve's IPCOP wall mounted rig. Simpler and quieter. I decided to build one of these after staring at my ESXi box sitting on the floor and wondering why it is sitting on the floor.
Went through the same process as above, but simpler. Didn't bother with the acrylic cover and used a rubber band hard drive mounting solution for the drives to reduce noise due to drive vibration. The only moving parts in this solution are the drives. No fans, no power supply fan either thanks to the picopsu power supply.
This rig pulls 25 watts of power at the outlet when idle. It has 4 gigs of RAM and a dual core Intel processor. Can't remember the model, but one of the ones that Toms hardware put up against the Atom processor as just barely pulling more watts, but blowing it away in performance.
2x 1TB Western Digital green hard drives.
These aren't as fast as other drives, and might not be the best choice for an ESX box where VMs are sharing the drives, but when you look at the stats and don't get bogged down in numbers, the real world speed difference between these drives and others are minimal and acceptable for the power savings.
As you can see below, I decided to take the CPU fan off. This CPU cooler is overkill when compared to the stock CPU cooler, the processor is 45nm and power efficient not overclocked, and I want it quiet and I enabled overheating processor throttling in the BIOS. I also turned the cooler so that the natural heat rising is able to radiate from the cooler as efficiently as possible.
None of these things matter really though, as the CPU and cooler just don't get hot enough for any throttling or heat related issues. It all works quietly and flawlessly. This isn't for everyone though, you may not want to take this risk and will want to test this to be sure that it is acceptable for your installation.
Note those are 3 inch screws and the hard drives do not touch anything solid. They are fully isolated by the rubber bands. This is the same idea as some of the quietly designed Antec cases. They mount the hard drives with similar rubber bands.